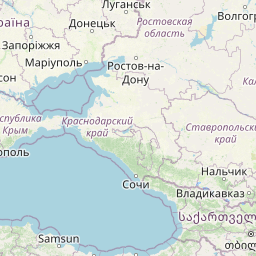
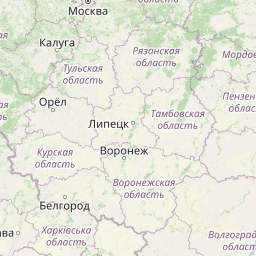
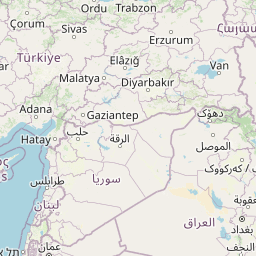
| Head southeast on 15 Temmuz Şehitleri Caddesi | 100 m |
| Make a U-turn and continue on 15 Temmuz Şehitleri Caddesi | 250 m |
| Continue onto Macar Kardeşler Caddesi | 500 m |
| Continue onto Fevzipaşa Caddesi | 700 m |
| Turn left onto Mütercim Asım Caddesi | 150 m |
| Continue onto Akşemsettin Caddesi | 500 m |
| Turn right | 55 m |
| Go straight onto Adnan Menderes Vatan Bulvarı | 1 km |
| Continue towards Çevreyolu | 9 km |
| Continue towards O-3: İstanbul Havalimanı | 250 km |
| Continue onto Edirne - Kapıkule Yolu (D-100) | 10 km |
| Continue onto Автомагистрала Марица (A 4) | 300 m |
| Keep left onto Автомагистрала Марица (A 4) | 100 km |
| Merge left onto Автомагистрала Тракия (A 1) | 150 km |
| Take exit 0 towards 1: Калотина | 600 m |
| Merge left onto Околовръстен път (1) | 8 km |
| Take the ramp towards А 6: Калотина | 350 m |
| Merge left onto Бул. Ботевградско шосе (1) | 700 m |
| Continue towards А 6: Калотина | 700 m |
| Continue onto Автомагистрала Европа (A 6) | 15 km |
| Take exit 49 towards 18: Кулата | 550 m |
| Merge left onto Околовръстен път (8) | 4.5 km |
| Take the ramp towards 8: Калотина | 300 m |
| Take the ramp towards E80: Калотина | 150 m |
| Merge left onto Бул. Европа (8) | 15 km |
| Continue onto Автомагистрала Европа (A 6) | 35 km |
| Continue onto A4 | 100 km |
| Keep left towards A1: Београд / Beograd | 550 m |
| Merge left onto A1 | 60 km |
| Continue onto A1 | 150 km |
| Keep left towards Budapest | 10 km |
| Continue onto Кијевски поток (A1) | 550 m |
| Continue onto Обилазница око Београда (A1) | 20 km |
| Keep left towards A3: Zagreb (HR) | 2.5 km |
| Merge right onto Аутопут (A3) | 90 km |
| Take the ramp | 350 m |
| Keep right at the fork | 150 m |
| Merge left onto A3 | 300 km |
| Take the ramp towards A2: Maribor | 250 m |
| Keep left towards A2: Maribor | 8 km |
| Continue onto Most Krapina (A2) | 200 m |
| Continue onto Zagrebačka obilaznica (A2) | 40 km |
| Continue onto Brezovica (A2) | 550 m |
| Continue onto Puhi (A2) | 10 km |
| Continue onto A4 | 35 km |
| Keep right towards (A) (H) | 700 m |
| Merge left onto A1 | 25 km |
| Continue onto Pyhrn Autobahn (A9) | 60 km |
| Keep left towards Salzburg | 150 km |
| Continue onto Innkreis Autobahn (A8) | 15 km |
| Keep left towards A8: Passau | 60 km |
| Continue onto A 3 | 150 km |
| Take the ramp towards A 93: Hof | 150 m |
| Keep left towards A 93: München | 600 m |
| Keep left towards A 3 | 100 km |
| Take the ramp towards B 4: Erlangen-Tennelohe | 250 m |
| Keep left towards B 4: Nürnberg | 400 m |
| Keep left towards A 3: Würzburg | 200 km |
| Keep left towards Köln | 9 km |
| Take the ramp towards A 66: Wiesbaden | 300 m |
| Keep left towards A 66: Wiesbaden | 350 m |
| Keep left towards A 3: Köln | 450 m |
| Merge left onto A 3 | 70 km |
| Take the ramp towards B 255: Montabaur | 70 m |
| Continue towards B 49: Montabaur | 450 m |
| Continue straight | 450 m |
| Keep left towards A 48: Köln | 450 m |
| Keep left towards A 3: Dreieck Dernbach | 500 m |
| Merge left onto A 3 | 80 km |
| Take the ramp towards A 4: Aachen | 1.5 km |
| Merge left onto A 4 | 70 km |
| Keep right towards Antwerpen | 10 km |
| Continue onto A76 | 25 km |
| Continue onto E314 | 90 km |
| Keep right towards E40: Brussel | 1.5 km |
| Merge left onto E40 | 10 km |
| Take the ramp towards E411 | 500 m |
| Keep right towards E40: Gent | 350 m |
| Merge left onto R0 | 15 km |
| Take the ramp towards E40: Gent | 1 km |
| Keep left towards Oostende | 900 m |
| Merge left onto E40 | 90 km |
| Keep left towards Calais | 40 km |
| Continue onto L'Européenne (A 16) | 55 km |
| Take the ramp towards Tunnel sous la Manche | 250 m |
| Keep left towards Tunnel sous la Manche | 800 m |
| Keep right at the fork | 100 m |
| Make a slight left | 55 m |
| Make a slight right | 25 m |
| Keep right at the fork | 550 m |
| Keep left at the fork | 100 m |
| Keep right at the fork | 15 m |
| Keep left at the fork | 250 m |
| Keep right at the fork | 90 m |
| Keep left at the fork | 25 m |
| Turn left | 10 m |
| Keep right at the fork | 200 m |
| Turn left | 350 m |
| Turn right | 100 m |
| Make a slight left | 15 m |
| Take the ferry Le Shuttle | 60 km |
| Continue slight right | 150 m |
| Make a slight right onto Over Bridge 3 | 900 m |
| Keep left at the fork | 1.5 km |
| Take the ramp towards London | 250 m |
| Keep right towards London | 50 km |
| Take the ramp on the left towards A20: Maidstone | 450 m |
| Keep left towards Maidstone | 350 m |
| Exit the traffic circle towards M20: Ashford | 450 m |
| Enter Cobtree Roundabout and take the 1st exit | 45 m |
| Exit the traffic circle | 350 m |
| Merge right onto A229 | 3.5 km |
| Take the ramp | 300 m |
| Enter Lord Lees Roundabout and take the 3rd exit onto A229 | 200 m |
| Exit the traffic circle onto A229 | 350 m |
| Enter Taddington Roundabout and take the 1st exit onto M2 | 15 m |
| Exit the traffic circle onto M2 | 600 m |
| Keep right onto M2 | 9 km |
| Continue onto Watling Street (A2) | 10 km |
| Continue onto Dartford Bypass (A2) | 3 km |
| Take the ramp on the left towards A282: Dartford Crossing | 1.5 km |
| Merge right onto Canterbury Way (A282) | 2.5 km |
| Keep left onto Canterbury Way (A282) | 4.5 km |
| Continue towards M25: (M11 | 25 km |
| Take the ramp on the left towards M11 (S): London (NE & C) | 800 m |
| Keep right towards M11: Stansted | 1 km |
| Merge right onto M11 | 20 km |
| Keep right onto M11 | 20 km |
| Keep right onto M11 | 25 km |
| Merge right onto Huntingdon Road (A14) | 20 km |
| Continue onto A14 | 100 m |
| Take the ramp on the left onto A14 | 100 km |
| Take the ramp on the left towards A46: Newark | 250 m |
| Enter the traffic circle and take the 1st exit onto Lincoln Road (A46) | 3.5 m |
| Exit the traffic circle onto Lincoln Road (A46) | 300 m |
| Take the ramp onto A46 | 1 km |
| Enter the traffic circle and take the 2nd exit onto A46 | 60 m |
| Exit the traffic circle onto A46 | 9 km |
| Enter Halfway House Roundabout and take the 2nd exit onto Fosse Way (A46) | 45 m |
| Exit the traffic circle onto Fosse Way (A46) | 4 km |
| Enter Hykeham Roundabout and take the 2nd exit onto A46 | 35 m |
| Exit the traffic circle onto A46 | 2.5 km |
| Enter the traffic circle and take the 2nd exit onto A46 | 70 m |
| Exit the traffic circle onto A46 | 900 m |
| Enter Doddington Roundabout and take the 2nd exit onto A46 | 80 m |
| Exit the traffic circle onto A46 | 2.5 km |
| Enter Skellingthorpe Roundabout and take the 2nd exit onto A46 | 55 m |
| Exit the traffic circle onto A46 | 2.5 km |
| Enter Carholme Roundabout and take the 2nd exit onto A46 | 55 m |
| Exit the traffic circle onto A46 | 2.5 km |
| Enter Riseholme Roundabout and take the 1st exit onto Ermine Street (A15) | 4.5 m |
| Exit the traffic circle onto Ermine Street (A15) | 4 km |
| Enter the traffic circle and take the 2nd exit onto Ermine Street (A15) | 45 m |
| Exit the traffic circle onto Ermine Street (A15) | 10 km |
| Enter Caenby Corner and take the 2nd exit onto Ermine Street (A15) | 45 m |
| Exit the traffic circle onto Ermine Street (A15) | 15 km |
| Enter Broughton Interchange and take the 3rd exit | 250 m |
| Exit the traffic circle | 500 m |
| Merge right onto M180 | 10 km |
| Take the ramp on the left onto M180 | 550 m |
| Enter Barnetby Top and take the 2nd exit onto A15 | 55 m |
| Exit the traffic circle onto A15 | 15 km |
| Enter the traffic circle and take the 2nd exit onto A164 | 100 m |
| Exit the traffic circle onto A164 | 1.5 km |
| Enter the traffic circle and take the 2nd exit onto A164 | 40 m |
| Exit the traffic circle onto A164 | 2.5 km |
| Enter the traffic circle and take the 2nd exit onto A164 | 60 m |
| Exit the traffic circle onto A164 | 1.5 km |
| Enter the traffic circle and take the 2nd exit onto A164 | 45 m |
| Exit the traffic circle onto A164 | 1 km |
| Enter the traffic circle and take the 1st exit onto Beverley Road (A164) | 35 m |
| Exit the traffic circle onto Beverley Road (A164) | 400 m |
| Enter the traffic circle and take the 1st exit onto Beverley Road (A164) | 40 m |
| Exit the traffic circle onto Beverley Road (A164) | 500 m |
| Continue onto Skidby Bypass (A164) | 1 km |
| Enter the traffic circle and take the 2nd exit onto Skidby Bypass (A164) | 55 m |
| Exit the traffic circle onto Skidby Bypass (A164) | 700 m |
| Continue onto Beverley Road (A164) | 2.5 km |
| Continue onto Victoria Road (A164) | 350 m |
| Go straight onto Victoria Road (A164) | 550 m |
| Enter the traffic circle and take the 2nd exit onto Victoria Road | 55 m |
| Exit the traffic circle onto Victoria Road | 1 km |
| Enter the traffic circle and take the 1st exit onto Queensgate | 20 m |
| Exit the traffic circle onto Queensgate | 450 m |
| Keep left onto Admiral Walker Road (B1230) | 350 m |
| Continue slightly left onto Lairgate (B1230) | 500 m |
| Turn right onto Hengate (B1230) | 200 m |
| Continue onto Norwood (B1230) | 800 m |
| Continue onto Hull Bridge Road (B1230) | 700 m |
| Enter the traffic circle and take the 2nd exit onto Hull Bridge Road (A1035) | 60 m |
| Exit the traffic circle onto Hull Bridge Road (A1035) | 8 km |
| Enter White Cross and take the 2nd exit onto A165 | 70 m |
| Exit the traffic circle onto A165 | 2 km |
| Enter the traffic circle and take the 2nd exit onto A165 | 50 m |
| Exit the traffic circle onto A165 | 2 km |
| Enter the traffic circle and take the 3rd exit onto A165 | 70 m |
| Exit the traffic circle onto A165 | 20 km |
| Enter Wilsthorpe Roundabout and take the 2nd exit onto Kingsgate (A1038) | 50 m |
| Exit the traffic circle onto Kingsgate (A1038) | 900 m |
| Enter the traffic circle and take the 1st exit onto Kingsgate (A1038) | 8 m |
| Exit the traffic circle onto Kingsgate (A1038) | 1.5 km |
| Turn right onto Shaftesbury Road | 350 m |
| Turn left onto South Marine Drive | 450 m |
| Turn right to stay on South Marine Drive | 250 m |
| Continue onto South Cliff Road | 150 m |
| Continue onto Hilderthorpe Road (B1254) | 100 m |
| Turn right onto Beck Hill | 150 m |
| Turn right onto Manor Street | 150 m |
| Turn right onto Bridge Street (B1254) | 30 m |
| You have arrived at your destination | 0 m |


