Are you a boat owner looking to give your vessel a fresh and appealing look? Painting your boat is an excellent way to restore its appearance and protect it from the harsh marine environment.
Whether you have a fiberglass, aluminum, or wooden boat, painting it can be a rewarding and enjoyable project.
Boats usually have a long lifespan, and they are definitely less exigent than cars when it comes to maintenance and repairs. However, they also require care due to the challenging weather conditions they have to bare.
In this article, we will guide you through the process of painting a boat step by step, ensuring you achieve professional results. Here’s what you should know before you start painting your boat.
Gathering the necessary supplies
Before you embark on your boat painting project, it’s essential to gather all the necessary supplies. Here are the key items you’ll need:
Choosing the right paint
Selecting the appropriate paint for your boat is crucial. Look for marine-grade paints designed to withstand the challenges of exposure to water, sunlight, and salt. Choose a paint that is suitable for your boat’s material, such as fiberglass, aluminum, or wood.
Selecting the appropriate brushes and rollers
Investing in high-quality brushes and rollers will make a significant difference in the final result. For smaller areas and detailed work, use high-quality brushes with synthetic bristles. For larger areas, such as the hull, opt for high-density foam rollers.
Preparing the boat surface
Before you start painting, proper preparation of the boat surface is essential. Ensure the surface is clean, dry, and free from any contaminants, such as dirt, grease, or old paint. This will help the paint adhere better and ensure a smooth and long-lasting finish.
Preparing the boat for painting
Once you have gathered all the necessary supplies, it’s time to prepare the boat for painting. Follow these steps to ensure a successful paint job:
Cleaning the boat
Thoroughly clean the boat’s surface using a boat cleaner or a mixture of mild detergent and water. Remove any dirt, grime, or residue to achieve a clean and smooth surface.
Sanding the boat surface
Use sandpaper or a sanding machine to gently sand the boat’s surface. This step helps remove any rough areas, old paint, and imperfections, allowing the new paint to adhere better. Sanding also promotes proper adhesion of the primer.
Applying primer
Applying a primer is crucial as it provides a smooth base for the paint and enhances its durability. Choose a primer that is compatible with your boat’s material. Apply the primer evenly and allow it to dry according to the manufacturer’s instructions.
Applying the paint
Now that the boat surface is prepared, it’s time to apply the paint. Follow these steps for a professional and long-lasting finish:
Choosing the painting technique
Consider the size of the boat and the area you’ll be painting. For smaller areas, use a brush, and for larger areas like the hull, use a roller. Ensure you choose the appropriate technique to achieve even coverage and minimize brush or roller marks.
Applying the first coat
Start by applying the first coat of paint. Use smooth and even strokes, moving in the same direction. Be mindful of any drips or runs and correct them immediately. Allow the first coat to dry according to the paint manufacturer’s instructions.
Sanding between coats
After the first coat has dried, lightly sand the painted surface with fine-grit sandpaper. This step helps create a smoother finish and improves adhesion for subsequent coats.
Applying additional coats
Apply additional coats of paint following the same technique as the first coat. Most paints require at least two or three coats for optimal coverage and protection. Allow each coat to dry fully before applying the next one.
Proper drying and curing
Proper drying and curing of the paint are crucial for achieving a long-lasting and durable finish. Follow these guidelines:
Allowing sufficient drying time
Ensure the paint is fully dry before exposing the boat to any moisture or harsh weather conditions. Follow the paint manufacturer’s recommendations for drying time, taking into account temperature and humidity.
Curing the paint
Curing refers to the chemical process by which the paint achieves its maximum hardness and durability. It typically takes a few weeks for the paint to fully cure, so avoid any abrasive contact or harsh cleaning during this period.
Cleaning up
Once you have completed the painting process, it’s essential to clean up properly. Follow these steps:
Properly disposing of paint-related waste
Dispose of any paint cans, brushes, and other painting supplies in accordance with local regulations. Avoid pouring leftover paint or cleaning agents down the drain or in regular trash bins.
Cleaning brushes and rollers
Clean your brushes and rollers immediately after use. Use the appropriate cleaning agent recommended for the type of paint you used. Properly clean and store your painting tools to ensure their longevity.
Maintenance and long-term care
To maintain the appearance and protect your newly painted boat, consider the following:
Regular cleaning and inspection
Regularly clean your boat to remove dirt, salt, and other debris that can damage the paint. Inspect the painted surfaces for any signs of wear, scratches, or chips. Promptly address any damages to prevent further deterioration.
Touching up any damages
If you notice any damaged or imperfections on the painted surface, touch them promptly. Use the same paint color and technique to ensure a seamless repair.
Applying a protective wax coating
Consider applying a protective wax coating to provide additional protection to your boat’s paint. Waxing creates a barrier against UV rays, saltwater, and other environmental factors that can degrade the paint.
How to paint a fiberglass boat
Fiberglass boats look great and their gelcoat is usually prone to be resistant. However, there comes a time when you need to paint them to restore their shiny look. If you want to do it on your own, arm yourself with a high dose of patience because it’s going to take some time.
Start by checking the hull, if there are any cracks or holes, repair them using putty. This preparation process also includes the sanding phase.
The second step is applying an epoxy layer that strengthens and protects the fiberglass surface.
After it is dried, apply the primer layer, wait for it to dry, then sand the surface. Finally, start painting the boat using ablative anti-fouling paint.
How to paint a boat hull
The boat hull needs to be taken care of thoroughly, otherwise, the paint will strip away fast.
First, you need to apply industrial solvent on the hull’s surface using a sponge. The second step is cleaning the hull with a power sand in order to remove any old paint remains.
If the boat hull has any flaws, try to fix them and apply the primer with a roller afterward. Finally, apply the layer of marine paint using a roller and a painting brush. Then let it dry for a few hours.
How to paint the deck
Before painting, you must carefully mask off the bottom; 3M masking tapes are the most common option. When you’re done, use solvent and try to remove any trace of dirt and dust. Then, mix the paint thoroughly then start applying it with a high-nap roller. Finally, remove the tape and let the paint dry for 1-2 days.
How to paint with gelcoat
Before applying gelcoat to your boat, there are a few prior steps you need to take in order to prepare the surface. You must start by removing elements like cleats, banisters, or louvers. Glue duct tape to the parts you could not remove. Then proceed by sanding the current gelcoat. After you’ve neatly done this, you’re ready to start applying the gelcoat using a spray version or a brush.
Best paint for boats
If you’ve decided to embark on a DIY boat painting journey, you need to know more about the best boat paints you could choose from. Here are the most popular options and their basic features:
- single-part polyurethane and enamel paints: they last long, they are easy to apply and affordable
- two-part polyurethane: this is considered the most durable paint. It is a very popular choice also because it ensures the strongest glossy effect.
- alkyd enamel: this is the best paint if you are relatively new at maneuvering the brush. It is not as shiny as the other ones, but it comes at a lower price.
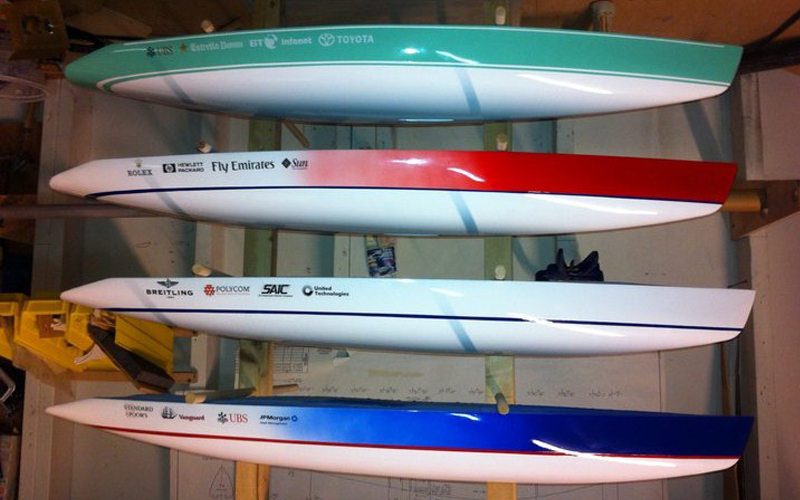
Sailboat paint schemes
When it comes to choosing the sailboat schemes, the range of possibilities seems infinite. More and more owners rush to personalize their sailboats. No wonder the number of providers ready to offer customization services is also increasing.
You can add any logo or pattern to your boat in any kind of color using tri-coat paint, 3M vinyl or other varieties.
The cost Of Painting a boat
Boat painting costs are relative depending on the size of your boat, the type of materials you want to use, the amount and difficulty degree of the repairs that might be necessary.
If you decide to appeal to professional help, you might be required to pay from $2,500 to $3,500 or even more. Check out the best boat paints.
If you opt to do it yourself, the materials can cost somewhere around $ 1,500.
There are plenty things to take into consideration before you decide to paint your boat like the amount of time, energy and money you have to invest. Bottom line; plan carefully before you take up to this challenging task.
F.A.Q.
What type of paint should I use for painting a boat?
It is recommended to use marine-grade paints specifically designed for boats. These paints offer better durability and protection against the marine environment.
Can I paint my boat without using primer?
Using a primer is highly recommended as it provides better adhesion and helps the paint last longer. It creates a smooth surface for the paint to adhere to and enhances the overall finish.
How long does it take for the paint to dry?
The drying time depends on various factors such as the type of paint used, temperature, humidity, and ventilation. Follow the paint manufacturer’s instructions for the recommended drying time.
How often should I repaint my boat?
The frequency of repainting depends on factors such as the type of paint used, sun and water exposure, and the maintenance level. As a general guideline, consider repainting your boat every 3-5 years or as needed.
Can I paint a boat by myself, or should I hire a professional?
Painting a boat can be done yourself if you have the necessary skills, patience, and equipment. However, for larger or more complex projects, or if you lack experience, hiring a professional painter is advisable to ensure the best results.
Last Words on Boat Painting
Painting a boat can be a rewarding and worthwhile project. By following the proper steps and using the right materials, you can achieve professional results and enhance the appearance and longevity of your boat.
Remember to gather all the necessary supplies, prepare the boat surface adequately, apply the paint in multiple coats, and allow proper drying and curing time. Regular maintenance and care will ensure the longevity of your boat’s paint job and keep it looking its best for years to come.